In Part 1 we looked at installing Red Gate’s SQL Monitor 4 on Windows Server 2008 and SQL Server 2008. Now in this second part, we will look at configuring SQL Monitor after it has been successfully installed.
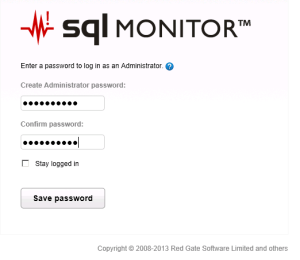
Before we can do any configuration, let’s create an Administrator role password to access the SQL Monitor 4 dashboard for an initial log on.
Red Gate SQL Monitor 4 has the following pre-defined roles for controlling access to the monitoring dashboard:
- Administrator Role – have unrestricted access to every features in SQL Monitor 4
- Standard User Role – can manage and configure alerts, cannot configure custom metrics, alerts or alert email settings, can view most areas except the Manage User Roles, Licensing and Base Monitor Connection pages
- Read-Only User Role – cannot configure any of the settings in SQL Monitor 4, can view most areas except the Manage User Roles , Licensing and Base Monitor Connection pages
Each role is activated when a password is assigned to the role. You can not create any other custom accounts with its unique username and password.
Here’s the dashboard global overview:
SQL Monitor 4 configurations are broadly categorise as follows:
- Monitoring
- Data Management
- Application Options
- Alerts and Metrics
- Licensing

Let’s look at some of the configurations:
- Monitored server (Monitoring)
- Data purging (Data Management)
- User roles (Application Options)
- Alert settings and Email settings (Alerts and Metrics)
1. Monitored server
To add an MS SQL Server machine to monitor, click Configurations on the top menu, then under the Monitoring section, click Monitored servers.
Click Add SQL Server to monitor, and then enter the machine-name\* to add all instances on that machine, or machine-name\instance-name to add a particular instance.
For the Host Machine Credentials, select Base Monitor Service Account* (this will be automatically pre-populated for you as Windows-Domain\Username) and for the SQL Server Instance, click Use Same Credential as Host Machine, or enter its authentication method, username and password.
Then finally, click Add. Repeat this process for all the MS SQL Server machines that need monitoring.
2. Data Purging
This configuration enables you to decide how long to keep various types of data in the SQL Monitor 4 Data Repository database. The 3 types of data store in the database that can be purged are categorised broadly as:
- Machine data
- SQL Server data
- Alert data
You can decide not to purge data (if the Data Repository database, but eventually needed due to disk space availability), or purge those older than:
- 1,2,3,5 days or
- 1,2 weeks or
- 1,2,3,6 months or
- 1 year
3. User Roles
If you wish to enable different levels of access to the dashboard, enter the password for the other non-adminstrator roles. Please note these roles won’t appear as an option on the logon prompt unless you create a password for the role.
4. Alerts settings and Email settings
In this section, you can configure the email and alert settings, and also custom alerts. First, let’s configure the email settings by Check Send emails when alerts are raised and completing the following:
- Send emails to box: email addresses (comma separated) of those that should received the alerts
- Send from email address: enter the sender’s email address
- Outgoing mail server (SMTP) – can be an IP Address or fully qualified domain name, and its port
- Check and enter optional security related mail server settings
Alert settings is the first item under the Alerts and Metrics section. Alert settings are separated into two categories:
- Host machine alerts
- SQL Server alerts
For each alert, you can
- Enable or disable the alert
- Set the threshold at which the alert is raised
- Choose to use the default email recipients list configured above, or add a specific email recipient to receive the alert
For example, here’s the screen for the Long Running Query Alert settings:
There are 3 levels of alerts to enable (but you don’t have to enable all levels):
- Low
- Medium
- High
You can specify the threshold at which each level is activated, and also exclude queries from activating an alert if they are known to be long running and not unusual.
The Notification sections allow you select to use the default email list (added when configuring the email settings) or a enter an email address for this particular alert.
Please note that the mail server settings must be configured to receive email alerts.
This covers some of the most important configurations for SQL Monitor. There are other configurations which you may want to look into, in particular the following:
- Trace
- Group
- Base Monitor Connection
- Custom Metrics
- Licensing
And lastly, the About link, provide a summary detail of the SQL Monitor components, i.e.
- Web Server
- Base Monitor
- Client Browser


